Eco-Friendly and Sustainable House Painting Options
In recent years, the shift towards eco-friendly practices has significantly influenced the house painting industry.
As awareness of environmental issues grows, homeowners are increasingly seeking sustainable options that minimize ecological impact without compromising on quality and aesthetics.
This article explores what makes a paint option both eco-friendly and sustainable, delving into the various types of paints available and the best practices for environmentally conscious painting.
The Basics of Eco-Friendly Paint
Understanding Low-VOC and Zero-VOC Paints
Volatile Organic Compounds (VOCs) are chemicals found in many traditional paints that can evaporate into the air and cause environmental harm. Low-VOC and Zero-VOC paints are designed to reduce or eliminate these emissions, making them a healthier choice for both the planet and indoor air quality.
The Role of Natural Ingredients in Sustainable Paints
Sustainable paints often incorporate natural ingredients such as clay, chalk, and lime. These materials are not only less harmful to the environment but also provide a unique aesthetic and texture to walls.
The Benefits of Water-Based Paints for the Environment
Water-based paints, unlike their oil-based counterparts, have a lower environmental impact. They emit fewer odors, are easier to clean up, and have a quicker drying time, reducing energy consumption during the painting process.
Sustainable Practices in House Painting
Eco-Friendly Preparation and Application Techniques
Adopting eco-friendly techniques in preparation and application is crucial. This includes using biodegradable cleaners, reusing materials, and employing efficient painting methods to reduce waste.
Recycling and Disposal of Paint and Materials
Proper disposal and recycling of leftover paint and materials play a significant role in sustainable painting. Many communities offer paint recycling programs to prevent hazardous waste in landfills.
Long-Term Sustainability: Durability and Maintenance of Eco-Friendly Paint
Eco-friendly paints now rival the durability of traditional paints. High-quality sustainable paints offer longevity, reducing the frequency of repaints and thus the environmental impact over time.
Choosing Eco-Friendly Paints for Different Surfaces
Best Options for Interior Walls
For interior walls, look for water-based or natural ingredient paints that offer easy cleaning and low toxicity, ensuring a safe and sustainable indoor environment.
Sustainable Choices for Exterior Surfaces
When selecting paint for exterior surfaces, consider factors like weather resistance and longevity. Paints that withstand environmental conditions without frequent touch-ups are ideal.
Safe Paints for Children’s Rooms and Sensitive Areas
In areas like children’s rooms, opt for zero-VOC and non-toxic paints. These paints ensure safety without compromising on quality and finish.
The Impact of Color Choices on Sustainability
Light Reflectance and Energy Efficiency
Choosing lighter paint colors can enhance light reflectance, reducing the need for artificial lighting and thereby saving energy.
FAQ
What are VOCs and why are low-VOC paints important?
VOCs are harmful chemicals that can cause health issues and environmental damage. Low-VOC paints significantly reduce these risks, making them a safer choice.
What is the difference between natural pigments vs. synthetic?
Natural pigments are preferable over synthetic ones as they are less damaging to the environment and often provide a richer, more natural color quality.
Can eco-friendly paints be as durable as traditional paints?
Yes, advancements in eco-friendly paint technology have resulted in products that are just as durable and long-lasting as traditional paints.
Are there any health benefits to using eco-friendly paints?
Using eco-friendly paints reduces exposure to harmful chemicals, leading to better indoor air quality and overall health.
How does paint color influence a home’s energy efficiency?
Lighter paint colors reflect more light, reducing the need for additional lighting and thus conserving energy.
What should I look for when choosing sustainable paint for outdoor use?
Look for paints that are weather-resistant, durable, and have minimal environmental impact, ensuring longevity and sustainability.
Conclusion
Embracing eco-friendly and sustainable house painting options is not only beneficial for the environment but also enhances the health and well-being of occupants. As the industry evolves, these choices are becoming increasingly accessible and effective, allowing homeowners to make responsible decisions that have a lasting positive impact.
Copper, the reddish-brown metal known for its bright metallic luster, has always held a special allure in interior design. When its warm glow is merged with epoxy countertops, the result is a truly mesmerizing effect that adds unique character to any living space.
The Aesthetic Appeal of Copper Finishes
Copper, with its deep, ruddy luster and warmth, has a mystique that few other metals can rival. Its rich hues, which range from reddish-brown to golden shades, have a timeless allure that transcends fleeting design trends. The aesthetic appeal of copper finishes lies not just in its innate beauty, but also in the emotions and ambiance it can evoke.
At the core of copper’s charm is its ability to harken back to different eras. It reminds us of ancient civilizations that used the metal for its durability and beauty, and of vintage homes adorned with copper fixtures and details that tell tales of yesteryears. Its warm glow exudes an aura of nostalgia, making spaces feel welcoming and intimately familiar.
Yet, copper’s versatility is where its true power lies. It can seamlessly blend with rustic themes, where its natural patina and worn look can take center stage. Simultaneously, in modern settings, a polished copper finish acts as a showstopper, providing a burst of warmth amidst cooler tones, and effortlessly marrying the contemporary with the classic.
Moreover, copper finishes play with light in a uniquely captivating way. Under ambient, softer lighting, its tones are subdued, offering a gentle shimmer. But when hit directly with light, it dazzles, reflecting luminosity in a way that feels both opulent and organic.
The transformative ability of copper finishes to both stand out and blend in, to be both modern and timeless, is what makes it a sought-after choice for designers and homeowners alike. Whether it’s a statement piece or a subtle touch, copper never fails to infuse spaces with a rich, aesthetic warmth that resonates deeply with the human psyche.
The Vintage Touch
Delving into the annals of design, copper has consistently been a marker of sophistication. Its warm hue evokes a sense of antiquity, reminding us of vintage kitchens and charmingly rustic settings. A copper finish on epoxy countertops not only adds warmth but also an ageless charm that never truly goes out of style.
Versatility in Design
Despite its vintage appeal, copper seamlessly integrates with a variety of design themes. Whether it’s a modern kitchen with sleek lines and minimalist designs or a more traditional space replete with wooden cabinets, copper provides a harmonious bridge, blending the old and new.
The Play of Light
One of the enchanting aspects of a copper finish is its interaction with light. Under the soft glow of ambient lighting, the copper sheen exudes a gentle shimmer. In contrast, under direct light, it can gleam powerfully, becoming an instant focal point.
Materials Essential for a Copper Finish
To get that shiny copper look, you’ll need a few important items. First, there’s the copper-colored paint or pigment that gives the finish its color. Next, you’ll need something to mix it with to make sure it stays on and lasts long. You’ll also need tools to mix everything just right. And of course, always remember to use safety gear to protect yourself. With the right stuff, you can turn regular surfaces into ones that look like copper.
Choosing the Right Copper Pigment or Mica Powders
The foundation of a captivating copper finish lies in the quality of the pigment. Opt for pigments or mica powders renowned for their vibrancy and longevity. Research brands, read reviews, and perhaps test a few to find the ideal shade that resonates with your design vision.
Epoxy Resin and Hardener Basics
The combination of epoxy resin and hardener creates a solid, durable surface. Ensure you use a high-quality product that’s compatible with your chosen pigment for the best results.
Necessary Mixing Tools and Containers
To achieve a consistent mix, you’ll need mixing sticks, calibrated containers, and possibly a low-speed drill with a mixing paddle attachment.
Prioritizing Safety: Gloves, Goggles, and Ventilation
Safety is paramount. Always work in a well-ventilated space, wear protective gloves to avoid skin contact, and use goggles to shield your eyes from any splashes.
The Process: Achieving a Copper Finish on Your Countertop
Getting a copper look on your countertop is a step-by-step process. First, clean and prepare the surface really well. Then, mix the right materials to get that shiny copper color. Spread this mixture smoothly on the countertop. Let it sit and harden for some time. If done right, you’ll have a countertop that not only works well but also looks beautiful with a copper touch.
Surface Preparation
Start with a thoroughly cleaned and sanded surface. This ensures optimal adhesion and reduces the chances of imperfections.
Creating the Perfect Copper Mix
Mixing is an art. Adhere to recommended ratios, blend your resin and hardener thoroughly before introducing your copper pigment, and always test a small patch before full application.
Application Mastery
Apply the mix using a spreader or squeegee, ensuring an even distribution. Tilt and maneuver the countertop to create desired patterns and effects.
Tips for a Smooth Curing Process
Allow the epoxy to cure in a dust-free environment. Monitor temperature and humidity levels, as these can influence curing time and the final outcome.
Challenges and Solutions in Copper Epoxy Application
Applying a copper epoxy finish comes with its set of challenges. From ensuring a smooth and bubble-free surface to maintaining a consistent metallic sheen, the process demands attention to detail.
However, for every challenge faced, there are proven solutions. With the right techniques, knowledge, and a bit of patience, common pitfalls can be easily overcome. Thus, even if initial hurdles arise, there’s always a way to navigate them and achieve that flawless, gleaming finish.
Avoiding Bubbles and Uneven Surfaces
To avoid bubbles, gently torch the surface post-application. For uneven surfaces, ensure your working space is level before application.
Ensuring Consistency in the Copper Sheen
Consistent mixing and application techniques are crucial. If you notice streaks or patches, consider a secondary thin layer application after the initial coat partially cures.
FAQs
How can I enhance the shine of my copper epoxy finish?
A top clear coat can enhance the shine and provide added protection.
Are there different shades of copper finishes available?
Absolutely. Copper pigments range from bright, shiny penny hues to deeper, burnished tones.
What precautions should I take when working with copper pigments?
Always work in a well-ventilated space, avoid inhalation, and prevent skin contact.
How do I fix areas where the copper finish looks patchy?
A secondary application or touch-ups with a smaller brush can rectify patchiness.
Can I combine copper with other metallic finishes?
Yes, blending copper with other metallic pigments like gold or bronze can create stunning effects.
The union of copper finishes and epoxy countertops brings forth a blend of functionality and aesthetics. With its timeless charm and versatility, copper remains an evergreen choice. As homeowners continue their quest for unique design elements, the trend of copper-finished epoxy countertops is here to stay, offering a slice of elegance in our everyday spaces.
Over the years, countertops can show signs of wear and tear, losing their initial shine and becoming victims to stains, scratches, and outdated designs. Replacing them entirely can be both a financial and logistical challenge. Enter epoxy—a resilient and versatile solution to give your old countertop a modern facelift.
Painting your countertops with epoxy not only refreshes their appearance but also provides a durable, water-resistant surface that’s easy to clean. The glossy finish achieved with epoxy mimics the look of higher-end stone materials like granite or quartz, without the hefty price tag.
For homeowners seeking an affordable yet transformative solution, epoxy offers an innovative method to revitalize their space. It’s a way to extend the life of existing countertops, enhance the aesthetic appeal of kitchens or bathrooms, and add a touch of luxury without embarking on a major renovation.
Whether aiming to increase property value or simply revamp a personal space, epoxy painted countertops are a worthy consideration for the modern homeowner.
Prepping for Your DIY Epoxy Countertop Project
Proper preparation is the cornerstone of a successful epoxy painting project. Ensuring your countertop is pristine and ready will yield the best results and prolong the life of your new finish. Here’s how to meticulously prep the area:
1. Clear and Clean: Begin by removing all items from the countertop—appliances, dishes, decor, and anything else. It’s essential to have an unobstructed workspace. Then, clean the surface thoroughly using a degreasing agent or mild dish soap. This will rid the countertop of oils, food residues, or any contaminants that might hinder the epoxy’s adherence.
2. Repair Minor Damages: Inspect the countertop for any cracks, chips, or dents. Use a filler or putty designed for countertop repair to mend these imperfections. Once the filler has dried, sand it down until it’s flush with the rest of the surface.
3. Sanding: Use a 220-grit sandpaper to lightly scuff the entire countertop. This isn’t about removing the old finish but creating a slightly rough texture that enhances epoxy adhesion. For laminates or non-porous surfaces, this step is particularly crucial. Always sand in the direction of the grain if one is visible.
4. Wipe Down: After sanding, there’ll be a fine dust residue on the surface. Using a damp cloth or a tack cloth, wipe down the entire countertop to ensure a dust-free surface. Allow it to dry completely.
5. Protect Surrounding Areas: Epoxy can be messy and hard to remove once dried. Protect your backsplash, cabinets, walls, and flooring by applying painter’s tape to edges and borders. For added protection, lay down plastic sheeting or drop cloths on the floor beneath the work area.
6. Ventilation: Ensure the space is well-ventilated. Open windows, use fans, or take other measures to ensure a consistent airflow. This will not only help dissipate strong epoxy odors but also assist in the curing process.
By taking the time to meticulously prepare, you’re laying the groundwork for a smoother application process and a stunning, long-lasting finish.
Essential Tools for Epoxy Countertop Painting
Tackling an epoxy countertop painting project requires a combination of standard painting tools and some specialty items to ensure a flawless finish. Here’s a comprehensive breakdown:
1. Epoxy Resin and Hardener: The primary components. Epoxy consists of a resin and a hardener that, when mixed, create a durable, glossy surface. Ensure you choose a high-quality product designed for countertops, as these are formulated to withstand daily wear and tear.
2. Mixing Containers: Epoxy needs to be mixed in precise ratios, which necessitates the use of mixing containers. Plastic or silicone mixing cups with measurement markings are ideal. Remember, once used for epoxy, these become single-use items, as hardened epoxy is difficult to remove.
3. Stir Sticks: Wooden sticks or spatulas are needed to ensure that the resin and hardener are mixed thoroughly. Proper mixing is essential for the epoxy to cure correctly.
4. Paint Brushes and Foam Rollers: For application. A foam roller helps achieve an even coat on larger surfaces, while brushes are handy for edges and tighter spots. Ensure they’re high quality to prevent stray bristles or foam particles from being left behind in the epoxy.
5. Plastic Trowel or Squeegee: Useful for spreading and leveling the epoxy over the countertop. They help ensure an even distribution and can aid in removing excess epoxy.
6. 220-Grit Sandpaper: Essential for prepping the countertop. This type of sandpaper ensures the surface is slightly roughened for optimal epoxy adhesion without causing noticeable scratches.
7. Protective Gloves: Epoxy can be sticky and tricky to remove from skin. Disposable nitrile or latex gloves are a must to keep your hands clean and protected.
8. Safety Goggles: Splashes or accidental flicks of epoxy can harm your eyes. Always wear safety goggles to guard against potential accidents.
9. Painter’s Tape: This blue or green tape is vital for protecting areas you don’t want the epoxy to touch, like walls, backsplashes, or appliances. It’s designed to be easily removable without leaving sticky residues.
10. Plastic Drop Cloths or Tarps: Given the liquid nature of epoxy, spills and drips are possible. Protect your floors and surrounding areas with drop cloths or plastic sheeting.
11. Propane Torch or Heat Gun: Bubbles are a common issue when applying epoxy. A propane torch or heat gun can be passed over the surface (without directly touching it) to pop these bubbles and ensure a smooth finish.
12. Ventilation Aids: Given the strong fumes associated with epoxy, it’s wise to have fans or other ventilation aids on hand. These help keep the air fresh and make the working environment safer.
The Art of Applying Epoxy
In any home improvement or artistic endeavor, having the right tools is only half the battle. The other half? The mastery of the application technique. Proper technique ensures that materials are used efficiently, results are consistent, and the end product stands the test of time.
When it comes to epoxy countertops, or indeed any surface treatment, the right application technique can make the difference between a smooth, flawless finish and a bumpy, uneven one. It’s the distinction between a project that lasts for years versus one that requires frequent touch-ups.
A skilled hand, informed by knowledge and experience, can navigate challenges, mitigate errors, and produce work that not only looks professional but also functions at its best.
In essence, the right application technique is the cornerstone of quality and durability in any project.
Applying Epoxy to Countertops: A Step-by-Step Guide
1.Safety First:
Before starting, ensure you’re wearing your safety goggles and protective gloves. The fumes from epoxy can be strong, so make sure the room is well-ventilated. Open windows and use fans to keep the air circulating.
2. Mixing the Epoxy:
Measure the Resin and Hardener: Using the mixing containers, measure out the resin and hardener according to the manufacturer’s specifications. The ratio is vital for the epoxy to set correctly.
Stir Together: Using a stir stick, mix the resin and hardener for several minutes. Mix thoroughly, ensuring there are no streaks. Be careful not to introduce too many air bubbles during this process.
3. Pouring the Epoxy:
Begin by pouring the mixed epoxy onto the center of your countertop.
If you’re working with a large countertop, you might prefer to pour smaller batches and work section by section. This prevents the epoxy from starting to set before you’ve had a chance to spread it.
4. Spreading the Epoxy:
Use a plastic trowel, squeegee, or foam roller to spread the epoxy over the surface. Push the epoxy towards the edges, ensuring an even coat. The aim is to get a uniform layer across the entire countertop.
For corners, edges, or backsplashes, a brush might be more maneuverable.
6. Finishing Touches:
Carefully inspect the surface for any missed spots, uneven areas, or debris that may have fallen onto the epoxy.
Use a brush or your trowel to smooth out imperfections. If debris is noticed, carefully pick it out without disturbing the surrounding area too much.
7. Curing:
Once you’re satisfied with the application, allow the epoxy to cure. It will start to harden within a few hours, but it might take days to fully set, depending on the product and room conditions.
During the curing period, it’s essential to keep the room free from dust and to prevent anything from touching the surface.
8. Second Coat (if necessary):
Depending on the product and your desired finish, in addition to the base coat a second coat to the countertop surface might be needed. If so, wait for the recommended time (usually indicated by the manufacturer) before applying the next layer. The process is the same as the first coat.
Potential Pitfalls When Applying Epoxy to Countertops:
1. Improper Mixing:
Ratios Off: If the epoxy resin and hardener aren’t mixed in the correct ratios, the mixture might not set correctly, leading to a sticky or soft surface even after curing.
Insufficient Stirring: Inadequate mixing can lead to uneven curing, with some parts hardening faster than others.
2. Air Bubbles:
After spreading, you might notice tiny air bubbles on the surface. Bubbles can form if the epoxy is mixed too aggressively, or if air gets trapped during application.
These need to be removed for a smooth finish.
Using a propane torch or heat gun, lightly go over the surface, holding the tool a few inches above. The heat will cause the bubbles to rise and pop. Move in a steady, sweeping motion to avoid overheating any section.
3. Contamination:
Dust, pet hair, or other debris landing on the epoxy before it sets can mar the finish.
Using dirty tools or containers can introduce contaminants that prevent smooth application.
4. Uneven Application:
Applying epoxy too thinly can lead to weak spots or areas that don’t fully cover the original countertop.
Applying too thickly can lead to drips, pooling, or longer curing times.
5. Temperature and Humidity Issues:
Epoxy is sensitive to the environment. If applied in conditions that are too cold, it might not spread evenly or cure correctly.
High humidity can introduce moisture into the mix, preventing it from setting or leading to a cloudy finish.
6. Inadequate Surface Preparation:
Not cleaning or sanding the countertop adequately can lead to poor adhesion. The epoxy might peel, chip, or lift over time.
Residual oils or greases can prevent the epoxy from adhering, leading to spots that don’t set.
7. Chemical Reactions:
Applying epoxy over certain pre-existing finishes or sealers might cause unwanted chemical reactions. This can lead to discoloration, bubbling, or uneven curing.
8. Safety Concerns:
Insufficient ventilation can cause a buildup of epoxy fumes, posing health risks and making the workspace uncomfortable.
Spills or drips can be challenging to remove from other surfaces if not addressed promptly.
9. Tinting or Coloring Errors:
If you’re adding tints or colors to the epoxy, improper mixing can lead to streaks or uneven shades.
Over-tinting can alter the epoxy’s properties, affecting its curing or finish.
10. Overworking the Surface:
Continually going over the epoxy trying to perfect it can introduce more problems. Overworking can trap air, create uneven spots, or disturb the curing process.
Adding Personal Touches To Epoxy Countertops
DIY epoxy countertops projects are more than just replicating stone looks. It’s about personalizing your space. Many DIY enthusiasts have integrated personal touches, embedding objects or creating unique patterns.
Popular Finishes for Epoxy Countertops:
1. Clear Gloss:
Description: This is a straightforward, high-gloss finish that amplifies the natural look of the surface below, whether it’s a stone, wood, or laminate countertop.
Popularity Reason: It offers a sleek, modern look while providing a protective layer against stains, scratches, and moisture.
2. Matte or Satin:
Description: A matte finish is devoid of the shiny gloss, offering a subdued, contemporary aesthetic. It’s less reflective than its glossy counterpart.
Popularity Reason: Matte finishes can be more forgiving to imperfections or minor blemishes. They provide a soft, smooth texture which many homeowners find appealing.
3. Metallic Epoxy:
Description:Metallic additives create a shimmering, three-dimensional appearance, often resembling natural stone patterns like marble or granite.
Popularity Reason: It adds a luxurious touch at a fraction of the price of natural stones. Each application is unique, giving countertops a one-of-a-kind appearance.
4. Quartz-like Finish:
Description: Combining epoxy with colored quartz granules, this finish resembles quartz countertops.
Popularity Reason: It offers the beauty of quartz without the high cost, while also being incredibly durable and stain-resistant.
5. Veined or Marbled:
Description: Through artistic manipulation, epoxy can be made to resemble natural stone with distinct veining. Multiple colors or tints are swirled together to achieve this look.
Popularity Reason: It offers the elegance of marble or natural stone without the associated price tag or maintenance requirements.
6. Terrazzo Style:
Description: By incorporating chips of glass, stone, or other materials, an epoxy countertop can mimic the look of terrazzo.
Popularity Reason: It’s a retro look that has made a comeback in modern interior design. The embedded chips add depth and texture to the countertop.
7. Embedded Objects:
Description: Some homeowners embed personal or decorative objects within the epoxy. This could be anything from small mementos to seashells or even glitter.
Popularity Reason: It offers a personalized touch, making the countertop a unique statement piece in the home.
8. Textured Finishes:
Description: This involves adding a textural component to the epoxy before it sets, giving the countertop a tactile feel.
Popularity Reason: It adds an additional sensory experience and can mimic other materials like textured stone or wood.
The Waiting Game
Once done, patience is key. Allow your counters to cure fully, which can take anywhere from several hours to days, depending on the product used.
Final Touches and Maintenance
For a refined look, sand any drips or rough spots using sandpaper. Cleanse your countertops regularly with mild dish soap. And remember, while epoxy is durable, it’s best to avoid placing hot items directly on the surface.
Further Ideas and Inspiration
Exploring platforms like Pinterest offers a plethora of ideas for your DIY epoxy countertop project. From intricate designs to simple solid colors, the choice is yours. Moreover, share your results and become part of the DIY community. Many people post their projects, and it’s a great way to learn and share tips.
Conclusion
The flexibility of epoxy is truly its standout feature. Whether homeowners desire a luxurious, marble-like finish, a shimmering metallic surface, or a personal touch with embedded objects, epoxy can cater to a plethora of design preferences. The potential to customize ensures that each countertop tells its own story and becomes a unique centerpiece in the home.
While the allure of epoxy countertops lies largely in their appearance, their functional benefits shouldn’t be overlooked. Epoxy-coated surfaces are resistant to many common household stains, can endure high heat, and are easy to clean. Their durability ensures that the countertop remains a focal point in the kitchen or bathroom for years to come.
As with any home project, painting countertops with epoxy requires due diligence, research, and a bit of elbow grease can lead to a rewarding transformation. In the end, an epoxy countertop isn’t just about a refreshed surface; it’s about reinventing a space while reflecting the tastes and aspirations of those who dwell within.
Tile can be a beautiful and durable material for your floors and walls, but sometimes you may want to update the look of your tile without replacing it entirely. That’s where painting comes in! Painting over ceramic tile can give your home a fresh new look without breaking the bank. In this blog post, we’ll walk you through the process of painting over ceramic tile, including the benefits, materials needed, preparation, painting, and frequently asked questions.
Benefits of Painting Ceramic Tile
Transforming the look of your ceramic tile can be a game-changer in the overall appearance of your home. There’s no doubt that ceramic tile is a popular choice for bathrooms, kitchens, and entryways due to its durability and water resistance. However, over time, it can become dull, outdated, or even damaged. Replacing ceramic tiles can be a costly and time-consuming project that not everyone can afford. Luckily, painting ceramic tile is a great alternative that offers a range of benefits.
Affordability
One of the main benefits of painting ceramic tile is affordability. With a small budget, you can achieve a brand-new look for your tile without breaking the bank. Moreover, it saves you the hassle of having to rip out the old tile and install new ones, which can be a daunting task, especially if you’re not an experienced DIYer.
Durability
Another great advantage of painting ceramic tile is durability. The finish created by painting ceramic tile is highly resistant to scratches and chips, making it perfect for high-traffic areas that get a lot of foot traffic. It is also water-resistant, and essential for bathroom and kitchen tiles, as they are frequently exposed to moisture. A painted ceramic tile can withstand the wear and tear of everyday life and maintain its fresh look for years to come.
Customization
The customization aspect of painting ceramic tile is another excellent benefit. With an extensive range of paint colors, finishes, and patterns, you can easily customize your tile to match your home’s decor and your personal style. You can get creative and mix and match colors and patterns to create a unique and striking design that complements your living space.
Now that you understand the benefits of painting ceramic tile, let’s delve into the process and materials needed to achieve a professional-looking finish.
Overview of the Process and Materials Needed
Before you begin your ceramic tile painting project, it’s important to have all the necessary materials on hand. Not only will this ensure that the process runs smoothly, but it will also save you time and frustration in the long run. Let’s review the materials you’ll need to get started.
First and foremost, you’ll need a high-quality paintbrush or roller to apply the paint. Choosing the right tool will make all the difference in the quality of your finished product. We recommend using a synthetic bristle brush or a high-density foam roller to achieve a smooth and even finish on your tile surface.
Next, you’ll need a paint tray to hold your paint and make it easy to apply. Choose a tray with a sturdy base and deep wells to prevent spills and make clean-up a breeze.
To protect any areas you don’t want to paint, you’ll need painter’s tape. Use it to tape off baseboards, countertops, or any other surfaces that may come into contact with the paint. Be sure to press the tape down firmly to prevent any bleed-through or smudging.
To prepare your tile surface for painting, you’ll need sandpaper. Use a fine-grit sandpaper to lightly sand the surface of the tile, creating a rough texture that will help the paint adhere better. Be careful not to sand too hard or you could damage the tile surface.
Cleaning your tile surface is an essential step before painting. You’ll need a cleaning solution specifically designed for ceramic tile surfaces. This will ensure that any dirt, grime, or grease is removed, leaving a clean surface for the paint to adhere to.
Lastly, you’ll need a high-quality primer and paint specifically designed for use on ceramic tile. This is crucial to ensure that the paint adheres correctly and provides a long-lasting finish that resists scratches and chips. Don’t skimp on the quality of your paint or primer, as it will only compromise the durability and overall look of your painted tile.
Preparing Ceramic Tile for Painting
As with any painting project, proper preparation is key to achieving a quality finish.
Cleaning the Tile Surface
The first step is preparation, which involves cleaning the tile surface, removing any old grout or caulk, and sanding the surface. Cleaning the tile surface ensures that it is free from any dirt, grease, or mildew that may prevent the paint from adhering correctly.
Removing old grout or caulk is essential to ensure a smooth and even finish. Sanding the surface creates a rough texture that allows the paint to stick better.
Priming
Now that you’ve cleaned and sanded your ceramic tile surface, it’s time to move on to the crucial step of priming. A primer is a must-have to ensure that your paint will adhere correctly to the tile and provide a long-lasting and durable finish. Don’t skip this step as it will make a significant difference in the overall quality of your painting job.
For best results, we recommend using a high-quality bonding primer designed specifically for ceramic tile surfaces. This type of primer contains special ingredients that promote adhesion and create a smooth and even surface for the paint to adhere to. A bonding primer will ensure that your paint won’t peel, crack, or flake off over time, and your newly painted tile will look as good as new for years to come.
Applying the primer is easy. Use a brush or roller to apply an even coat of primer to the tile surface, making sure to cover all areas thoroughly. Pay special attention to the edges and corners to ensure complete coverage. Let the primer dry completely before applying the paint. The drying time will vary depending on the primer you use, so be sure to read the manufacturer’s instructions carefully.
By taking the time to prime your ceramic tile properly, you’re setting yourself up for success and ensuring a flawless finish that will stand the test of time. Don’t rush this step or cut corners, as it will only compromise the quality of your painting job. Trust us, the end result will be worth the extra effort!
Painting
Once the preparation is complete, it’s time to start painting. Choose a high-quality paint designed specifically for use on ceramic tile, and make sure it’s a color that complements your home’s decor.
Apply the first coat of paint in thin, even strokes, and be sure to allow it to dry completely before applying a second coat. The drying time will depend on the specific paint product you use, so be sure to read the manufacturer’s instructions carefully.
After the first coat of paint has dried, inspect the tile surface for any imperfections or missed spots, and touch up as needed. Apply a second coat of paint if desired, being sure to allow it to dry completely before using the tile.
Ceramic Tile Painting FAQs
Here are the answers to some frequently asked questions about painting ceramic tile:
Can I paint over glazed ceramic tile?
Yes, you can paint over glazed ceramic tile. Just be sure to clean the surface thoroughly and sand it lightly to create a rough surface for the primer and paint to adhere to.
What kind of paint should I use for ceramic tiles?
You should use paint specifically designed for use on ceramic tiles, such as ceramic tile epoxy paint or high-quality acrylic paint.
Do I need to prime the tile before painting it?
Yes, it’s essential to prime the tile before painting it to help the paint adhere properly and prevent chipping or peeling.
How long will the painted ceramic tile last?
With proper preparation and application, painted ceramic tile can last for several years.
Can I use a stencil to create a design on the tile?
Yes, you can use a stencil to create a design on the tile. Just be sure to choose a stencil that’s specifically designed for use on tile and follow the manufacturer’s instructions carefully.
How long does it take for ceramic paint to dry?
The drying time for ceramic paint can vary depending on several factors, such as the type of paint, the thickness of the coat, and the humidity and temperature of the environment. Generally, most ceramic tile paints require about 24-48 hours to fully dry and cure. It’s important to allow sufficient drying time between coats of paint to ensure that the paint fully adheres and dries evenly. Be sure to check the manufacturer’s instructions on the paint can for specific drying times and recommendations. Additionally, it’s important to avoid exposing the painted tile to moisture or heavy use until it has fully cured to prevent any damage or chipping.
Can you paint with light color over dark color ceramic tiles?
Yes, it is possible to paint a light color over a dark color ceramic tile, but it may require additional coats of paint to achieve the desired color and coverage. To ensure the best results, it’s important to properly clean and prime the tile surface before applying the paint. This will help the paint adhere evenly and provide a smooth and durable finish. Additionally, it’s important to choose a high-quality paint specifically designed for use on ceramic tile and follow the manufacturer’s instructions for application and drying times.
If you’re a DIY homeowner considering painting your kitchen cabinets, you’re not alone. Many homeowners opt for a kitchen cabinet paint job as a cost-effective way to transform the look of their kitchen without having to replace the cabinets.
However, painting kitchen cabinets can be a daunting task, especially if you’re doing it for the first time. But with the right preparation, paint selection, and techniques, you can achieve a successful paint job and transform the look of your kitchen.
In this guide, we’ll provide a comprehensive list of tips and tricks for a successful kitchen cabinet paint job, taking you through every step of the process.
Preparing the Cabinets
Proper preparation is key to a successful paint job. Start by removing all cabinet doors and hardware, and thoroughly clean the cabinets with a degreaser to remove any grease, dirt, or grime.
Grease and other residues can prevent the paint from adhering properly, so it’s important to make sure the cabinets are clean before you start painting. Once the cabinets are clean, sand them with fine-grit sandpaper to create a smooth surface for the paint to adhere to.
Sanding also helps remove any scratches, dings, or imperfections on the cabinets. After sanding, wipe the cabinets down with a tack cloth to remove any dust or debris. This step is important because any remaining dust or debris can affect the paint finish and create an uneven surface.
Paint Selection
Selecting the right paint is essential to achieving a lasting finish. For kitchen cabinets, we recommend using high-quality paint that is durable, easy to clean, and has a smooth finish.
You want to choose a paint that is specifically formulated for cabinets or trim work, as they are designed to withstand the wear and tear of everyday use. Semi-gloss or gloss finishes are ideal for kitchen cabinets as they are easier to clean and more resistant to moisture and stains.
If you’re not sure what paint to use, talk to the paint expert at your local hardware store or consult with a professional painter.
Cabinet Painting Techniques
Using the right painting techniques can make all the difference in achieving a successful paint job. Start by applying a high-quality primer to the cabinets to help the paint adhere better and create a smooth surface.
Primer also helps cover up any dark stains or discolorations on the cabinets. Apply the primer in thin, even coats, and allow it to dry completely before painting. When it comes to painting, use a brush or roller to apply the paint in thin, even coats.
Don’t try to apply too much paint at once, as this can lead to drips and a less-than-smooth finish. It’s better to apply two or three thin coats of paint than one thick coat. Also, be sure to paint in the direction of the grain of wood for a more natural look.
Drying and Curing
Allowing the paint to dry and cure properly is crucial to achieving a lasting finish. Follow the manufacturer’s instructions for drying and curing times, and make sure the cabinets are completely dry before reattaching the doors and hardware.
It’s important to allow the paint to cure fully before using the cabinets. This can take anywhere from a few days to a week or more, depending on the type of paint you’re using and the climate conditions.
Resist the temptation to rush the drying process, as this can lead to a less-than-perfect finish.
Finishing Touches
Finishing touches can give your cabinets a professional look and make all the difference in achieving a successful paint job. Consider adding decorative touches such as molding, new hardware, or a contrasting color to
complement your painted cabinets. These details can add a personal touch and make your cabinets stand out.
Cabinet Maintenance
Maintaining your newly painted cabinets is important for keeping them looking great for years to come. Avoid using harsh cleaners or abrasives that can damage the paint finish, and use a soft cloth or sponge to wipe down the cabinets regularly.
If you do need to clean off stubborn stains or spills, use a mild soap and water solution and gently scrub the area. Avoid using excessive water or allowing water to sit on the cabinets for too long, as this can cause the paint to peel or warp.
Mistakes to Avoid
While painting your kitchen cabinets can be a great DIY project, there are a few mistakes to avoid to ensure a successful paint job. One common mistake is not properly preparing the cabinets before painting.
Failing to clean and sand the cabinets can lead to a less-than-perfect finish and the paint may not adhere properly. Another mistake is rushing the drying process. Allowing the paint to dry and cure fully is crucial to achieving a lasting finish.
Finally, using the wrong paint or painting techniques can also lead to a less-than-perfect finish. Be sure to choose high-quality paint designed for cabinets and use the right painting techniques to achieve a smooth finish.
In conclusion, painting your kitchen cabinets is a cost-effective way to transform the look of your kitchen. However, it’s important to follow these tips and tricks for a successful paint job.
Proper preparation, paint selection, and painting techniques are key to achieving a lasting finish. With patience and attention to detail, you can achieve a professional-looking paint job and enjoy your newly painted cabinets for years to come.

 In recent years, the shift towards eco-friendly practices has significantly influenced the house painting industry.
  Volatile Organic Compounds (VOCs) are chemicals found in many traditional paints that can evaporate into the air and cause environmental harm. Low-VOC and Zero-VOC paints are designed to reduce or eliminate these emissions, making them a healthier choice for both the planet and indoor air quality.

 Mixing is an art. Adhere to recommended ratios, blend your resin and hardener thoroughly before introducing your copper pigment, and always test a small patch before full application.
 Applying a copper epoxy finish comes with its set of challenges. From ensuring a smooth and bubble-free surface to maintaining a consistent metallic sheen, the process demands attention to detail.
  Over the years, countertops can show signs of wear and tear, losing their initial shine and becoming victims to stains, scratches, and outdated designs. Replacing them entirely can be both a financial and logistical challenge. Enter epoxy—a resilient and versatile solution to give your old countertop a modern facelift.
 Proper preparation is the cornerstone of a successful epoxy painting project. Ensuring your countertop is pristine and ready will yield the best results and prolong the life of your new finish. Here’s how to meticulously prep the area:
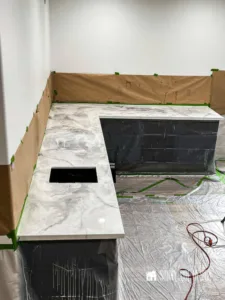 5. Protect Surrounding Areas: Epoxy can be messy and hard to remove once dried. Protect your backsplash, cabinets, walls, and flooring by applying painter’s tape to edges and borders. For added protection, lay down plastic sheeting or drop cloths on the floor beneath the work area.
 Tackling an epoxy countertop painting project requires a combination of standard painting tools and some specialty items to ensure a flawless finish. Here’s a comprehensive breakdown:
 In any home improvement or artistic endeavor, having the right tools is only half the battle. The other half? The mastery of the application technique. Proper technique ensures that materials are used efficiently, results are consistent, and the end product stands the test of time.
 Use a plastic trowel, squeegee, or foam roller to spread the epoxy over the surface. Push the epoxy towards the edges, ensuring an even coat. The aim is to get a uniform layer across the entire countertop.

 The first step is preparation, which involves cleaning the tile surface, removing any old grout or caulk, and sanding the surface. Cleaning the tile surface ensures that it is free from any dirt, grease, or mildew that may prevent the paint from adhering correctly.
 Once the preparation is complete, it’s time to start painting. Choose a high-quality paint designed specifically for use on ceramic tile, and make sure it’s a color that complements your home’s decor.
 Proper preparation is key to a successful paint job. Start by removing all cabinet doors and hardware, and thoroughly clean the cabinets with a degreaser to remove any grease, dirt, or grime.
 Selecting the right paint is essential to achieving a lasting finish. For kitchen cabinets, we recommend using high-quality paint that is durable, easy to clean, and has a smooth finish.
 Using the right painting techniques can make all the difference in achieving a successful paint job. Start by applying a high-quality primer to the cabinets to help the paint adhere better and create a smooth surface.